More Accessible Tracker
In which a bozo attempts to do SteamVR tracking for cheap.
Talking I²C, and a base for UART communication
2023-05-25
It's been a minute.
I was busy with school and the rest of this MSD project, but I'm finished with all that now, and have decided to spend the rest of the summer working on this project, so hopefully there will be at least a few updates in the next few months.
...is what I would have said on the 11th of May, if I hadn't had a bout of health issues over the last couple weeks. I'm back now, and working on the project again, and have some exciting updates:
I²C
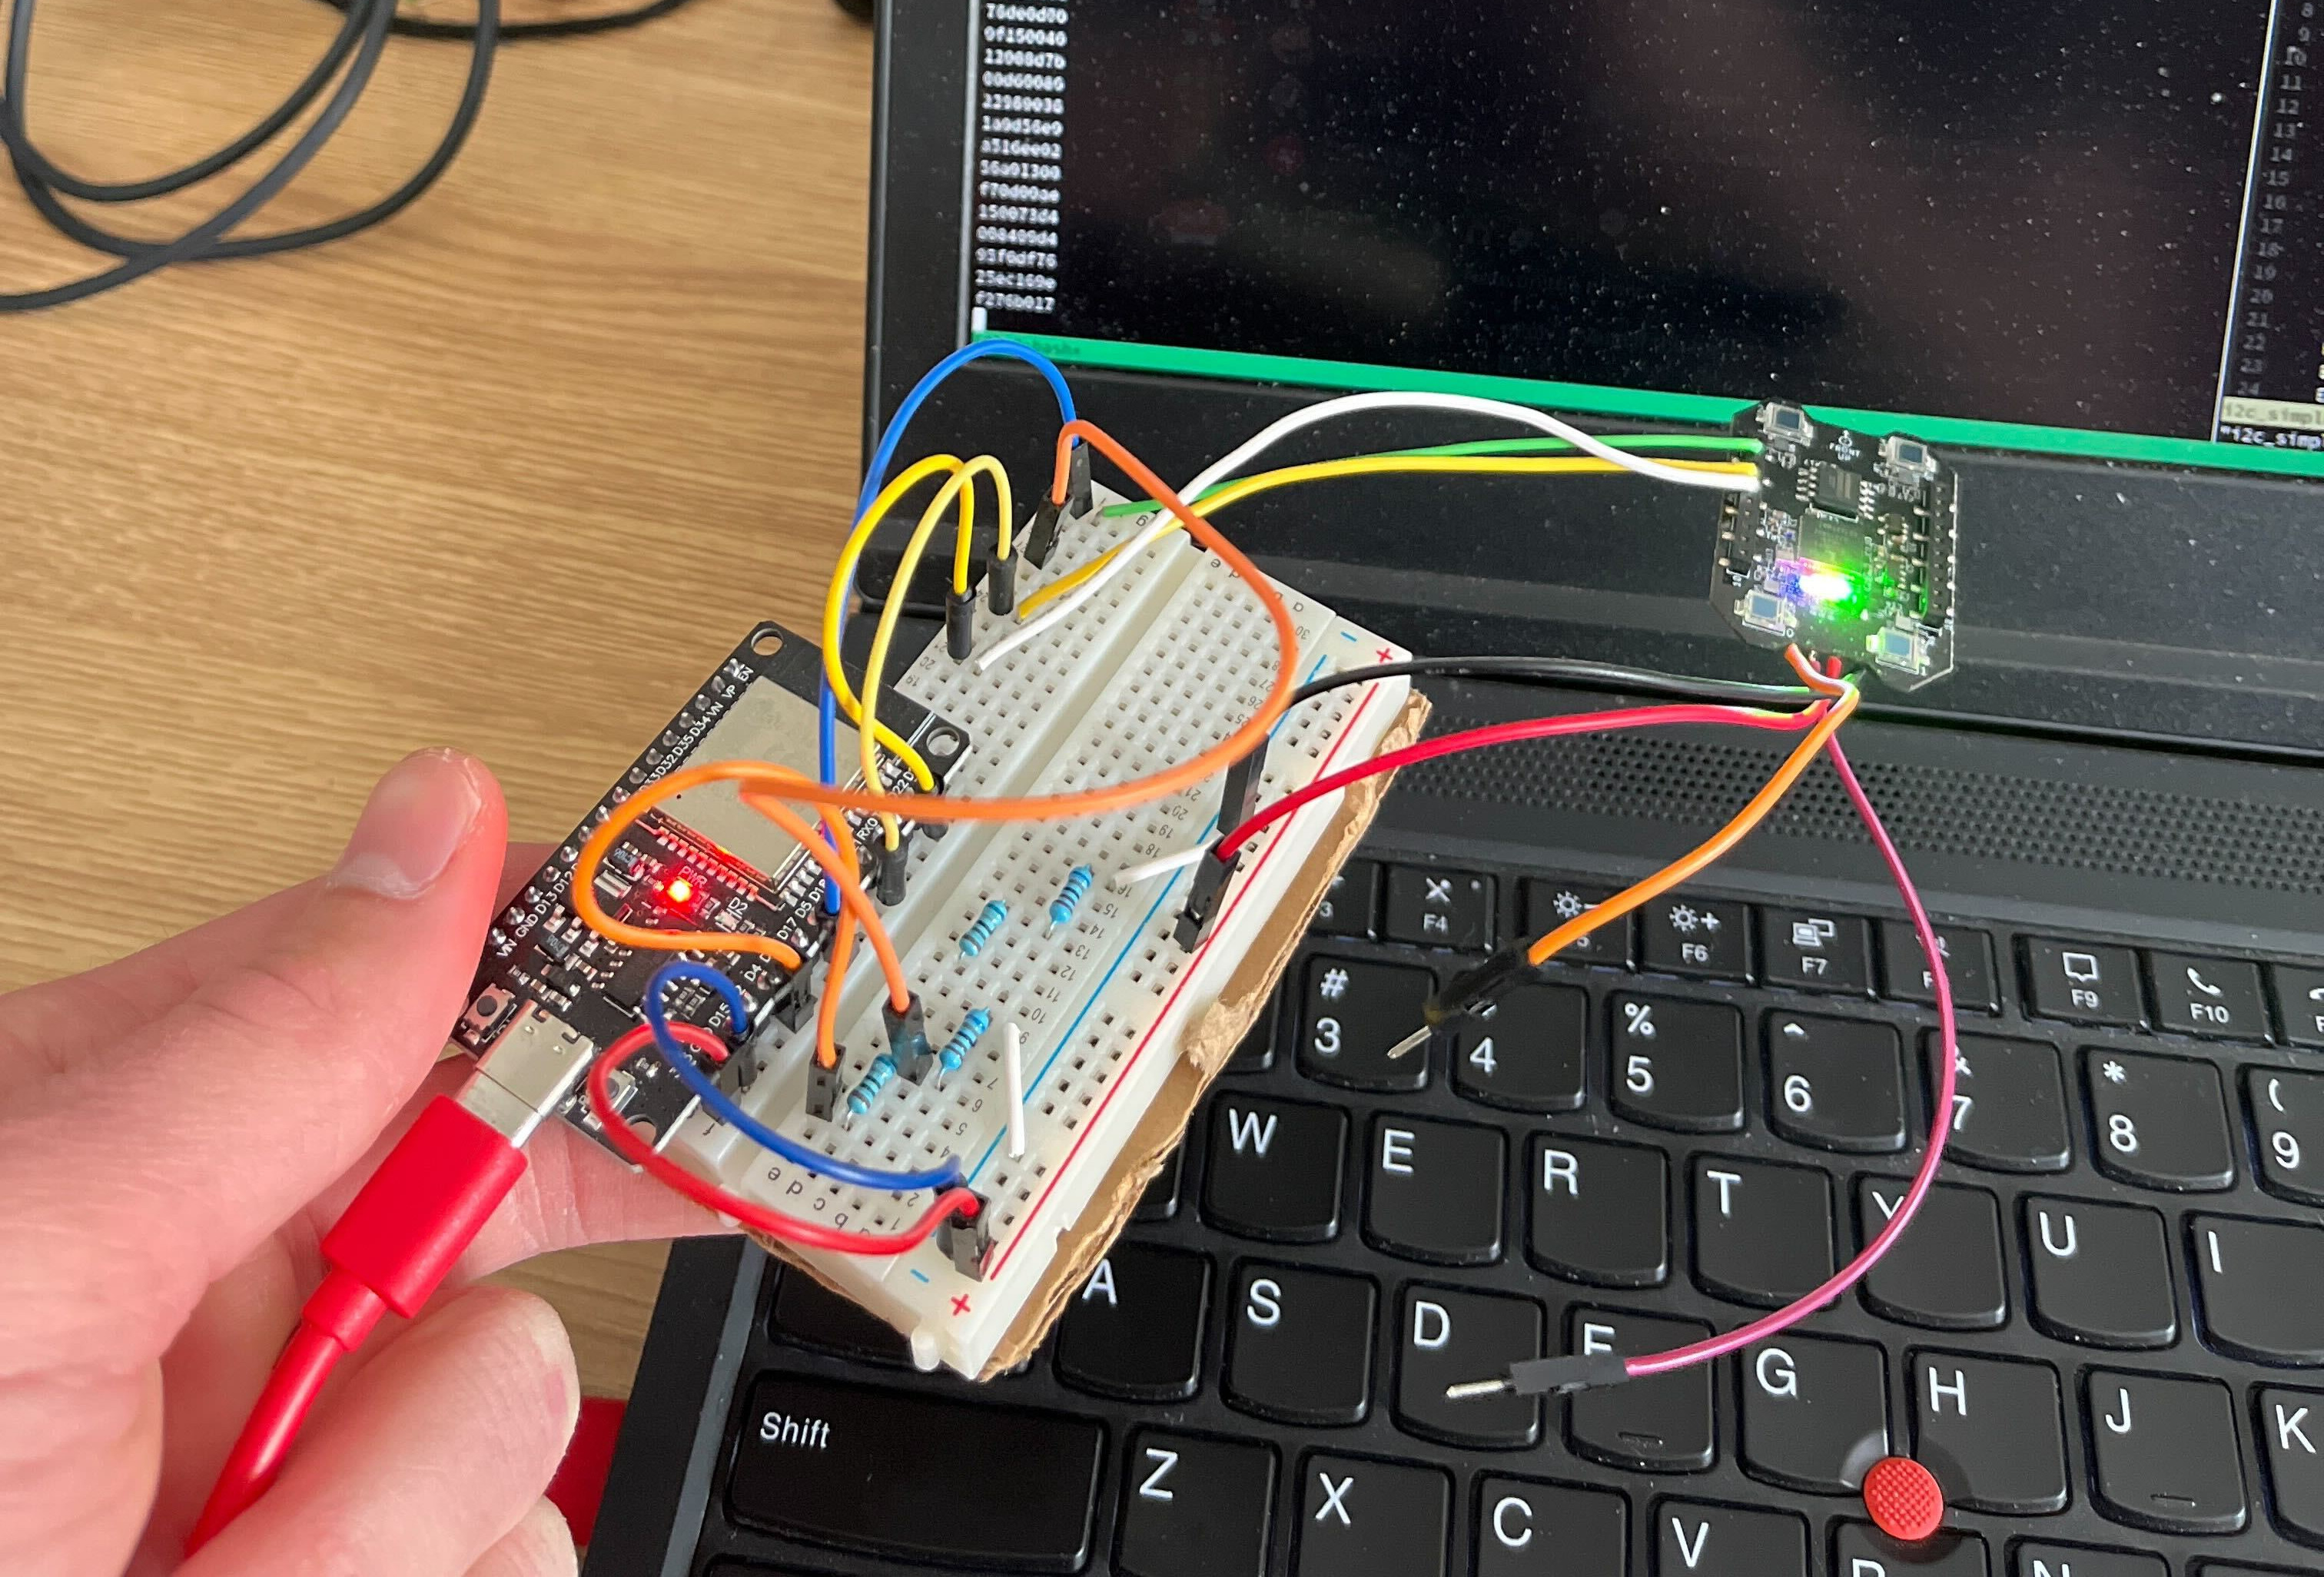
The FPGA has two components: a bootloader, and firmware. This design makes the board "unbrickable," since you can always flash new firmware if you mess something up. Anyway, this page details how that bootloader protocol works. Initially, I was trying to talk to it over UART 1 on the solder pads exposed, but that proved to be an exercise in futility. Instead, I shoved some jumper cables into the crazyflie expansion ports present on the deck, and set up I²C on an ESP32. I didn't bother regulating the voltage, and simply talk to it at 3.3V. To check if it worked, I tested the "Version" command, then I sent it the requisite boot commands, and he booted right up! The LEDs went from "Red and Blue" to "EVERYTHING!" There appear to be UART commands you can send to change those LEDs, but that's not really required for operation, since this thing is mostly stateless, and just vomits pulse data at you, I guess.
UART
That's a nice little segue into the UART! Once the board is up, data spools in from UART0, once again located on those expansion pins. The protocol for that can be found documented in the lighthouse-fpga README, and you can find code for that in the Crazyflie firmware.
The thing about this system that didn't really occur to me until I got in touch with Bitcraze about this project is that everything important happens onboard the crazyflie. This means that a large part of what the Vive Trackers do hasn't been implemented, that is, use 2.4GHz RF to talk to the PC so that it can do all of the solving. This is good news and bad news: Good news, I won't have to port much of their STM32 code to the ESP32, I basically just have to get the data and shunt it somewhere. Bad news: I have implement the shunting. Luckily, this seems to be a solved problem. Products like the Tundra Tracker SoC have a Nordic nRF52832 RF processor that deals with communication to the PC by way of their dongle, or perhaps a watchman dongle? (I don't know if this product would work with a Watchman dongle, but I imagine the tech is very similar). So, either I can do something fancy with the ESP32 (it has onboard 2.4GHz radios of some kind, maybe I can use those?), or I can bring in some Nordic chip to do that for me. Small issue: Cost. My digikey parts list is already up to $60 on its own, and that sucks! So, I'd like to figure out how to do all this with as little hardware as possible.
But I'm getting ahead of myself. That's the next problem. Right now, I'm just trying to correctly interpret data from the deck (specifically, today, I'm learning about the sync pulses), and prepare it for... whatever's next (probably sending to the PC). After that, I'll probably need an IMU.
I wrote this post as an update, since it's been so long. As I said, I wanted to send something out sooner, but I got sick. Hopefully in the next week or three, I'll have another update, and can begin working on the IMU and/or communication issues.
Code, please?
Sure! It's literally garbage right now, but you can find my repo here. All it does is boot up the board and vomit whatever it gets back on UART.
Compiling the lighthouse-fpga project
2023-03-07
Hello again. I feel that this page is overdue for an update, so here's one: I've managed to compile the FPGA implementation!
Specifically, the bitcraze lighthouse-fpga repository. It contains HLS code written in Scala along with a smattering of Verilog required to create a bitstream that can be loaded onto the Lattice ice40up5k FPGA. I'll leave the details about their implementation as an exercise to the reader (the README for that project is pretty in-depth).
The part I was interested in was here. Before I went any further, I wanted to see if I could figure out the toolchain for this board to be sure that I knew how to make changes. Their instructions entail downloading, building, and installing a couple tools, so I followed this guide on a spare laptop I had to ensure that I wouldn't accidentally destroy my school laptop. But, when I typed make...
ERROR: Unable to find legal placement for all cells, design is probably at utilisation limit.
Hm, well, there's instructions for generating a new timing seed in case you get timing errors, but no, this isn't a timing error. I believe this error was related to the design being too big to fit on the hardware. Describing an FPGA is out of scope for this blog (google it), but TL;DR, it's basically a chip with a whole bunch of LUTs that you can configure to act like any kind of logic circuit, as long as that circuit can translate to—and fit on—that array of LUTs. Around this point, I opened an issue to track my progress, and also to hopefully get someone's attention that their documentation doesn't Just Work.
The first thing I tried was reverting back to the most recent tag. Maybe something was off about the design in the master branch, even though the CI was working, but surely this one would work?
    ...
Info: Annotating ports with timing budgets for target frequency 24.00 MHz
Info: Checksum: 0x7d970e13

Info: Device utilisation:
Info:            ICESTORM_LC:  4959/ 5280    93%
Info:           ICESTORM_RAM:    18/   30    60%
Info:                  SB_IO:    14/   96    14%
Info:                  SB_GB:     8/    8   100%
Info:           ICESTORM_PLL:     1/    1   100%
Info:            SB_WARMBOOT:     1/    1   100%
Info:           ICESTORM_DSP:     0/    8     0%
Info:         ICESTORM_HFOSC:     0/    1     0%
Info:         ICESTORM_LFOSC:     0/    1     0%
Info:                 SB_I2C:     0/    2     0%
Info:                 SB_SPI:     0/    2     0%
Info:                 IO_I3C:     0/    2     0%
Info:            SB_LEDDA_IP:     0/    1     0%
Info:            SB_RGBA_DRV:     0/    1     0%
Info:         ICESTORM_SPRAM:     0/    4     0%

Info: Placed 17 cells based on constraints.
Info: Creating initial analytic placement for 4544 cells, random placement wirelen = 119963.
Info:     at initial placer iter 0, wirelen = 1157
Info:     at initial placer iter 1, wirelen = 1036
Info:     at initial placer iter 2, wirelen = 1001
Info:     at initial placer iter 3, wirelen = 1096
Info: Running main analytical placer, max placement attempts per cell = 3126250.
Info:     at iteration #1, type ALL: wirelen solved = 1011, spread = 33666, legal = 54569; time = 4.92s
Info:     at iteration #2, type ALL: wirelen solved = 1872, spread = 25194, legal = 60314; time = 21.05s
Info:     at iteration #3, type ALL: wirelen solved = 3028, spread = 21014, legal = 57499; time = 9.17s
ERROR: Unable to find legal placement for all cells, design is probably at utilisation limit.
10 warnings, 1 error
make: *** [Makefile:20: lighthouse.asc] Error 255
OK, why didn't that work? What's the CI doing that I'm not?
Run docker run --rm -v ${PWD}:/module bitcraze/fpga-builder ./tools/build/build
Unable to find image 'bitcraze/fpga-builder:latest' locally
latest: Pulling from bitcraze/fpga-builder
Oh, there's a docker container. That wasn't mentioned in the README.
I would actually later find out that there's a utility they have called toolbelt that I probably should have been using to build this.
So, I pulled the docker container, and set up a copy of the repo I could pass in as a volume (since I wanted to keep the build artifacts). I also switched to Freedom, Computer Science House's gigantic 48-core compute server, in case I could speed up compilation more.
podman run --rm -it \
    -v /scratch/wilnil/lighthouse-fpga/:/module/workdir:Z \
    --name bitcraze docker.io/bitcraze/fpga-builder
After that, I cd'ed into /module/workdir, ran make, and...
ERROR: Max frequency for clock          'Core_clk': 47.03 MHz (FAIL at 48.00 MHz)
ERROR: Max frequency for clock 'Slow_clk_$glb_clk': 21.16 MHz (FAIL at 24.00 MHz)
OK! Progress! That's a timing error! This is expected :) So, now I have to run their search_seed.py just like the documentation says.
Except, search_seed.py launched a Docker container. I don't have Docker, and I don't want Docker. However, I noticed that the V6 tag (I was still on master on Freedom) had an actual script, and not a Docker container. So I launched that on a single thread. The script, as far as I could tell, just tried to compile the design over and over again with a different seed, which, on a single core, would have taken hours. A quick tweak to the Python code, and I was doing 48 seeds at a time, which, on Freedom, took about 20 minutes to get through all 1000 seeds.
After running through all 1000 seeds like 5 times, I had 3 seeds. None of them worked, though, and I don't really know why. Luckily, someone had replied to my issue and told me to try reducing a multiplier that had been set really high as a precaution. There's a function in the Scala HLS that is part of the pulse processing process (lol) that had that had a speed multiplier set to 4 to deal with a worst case scenario that would never actually happen.
So, I set that multiplier to 1, and...
Info: Max frequency for clock          'Core_clk': 51.58 MHz (PASS at 48.00 MHz)
Info: Max frequency for clock 'Slow_clk_$glb_clk': 24.97 MHz (PASS at 24.00 MHz)

Info: Max delay <async>                   -> posedge Slow_clk_$glb_clk: 4.19 ns
Info: Max delay posedge Core_clk          -> posedge Slow_clk_$glb_clk: 5.47 ns
Info: Max delay posedge Slow_clk_$glb_clk -> <async>                  : 15.08 ns
Info: Max delay posedge Slow_clk_$glb_clk -> posedge Core_clk         : 17.20 ns

Info: Slack histogram:
Info:  legend: * represents 30 endpoint(s)
Info:          + represents [1,30) endpoint(s)
Info: [  1447,   3297) |+
Info: [  3297,   5147) |+
Info: [  5147,   6997) |*+
Info: [  6997,   8847) |*******************+
Info: [  8847,  10697) |****+
Info: [ 10697,  12547) |***********+
Info: [ 12547,  14397) |*********+
Info: [ 14397,  16247) |*********+
Info: [ 16247,  18097) |*************+
Info: [ 18097,  19947) |**+
Info: [ 19947,  21797) |***+
Info: [ 21797,  23647) |*+
Info: [ 23647,  25497) |*+
Info: [ 25497,  27347) |*******+
Info: [ 27347,  29197) |********+
Info: [ 29197,  31047) |**********+
Info: [ 31047,  32897) |**********+
Info: [ 32897,  34747) |*****************+
Info: [ 34747,  36597) |*********************************************************+
Info: [ 36597,  38447) |************************************************************
10 warnings, 0 errors

Info: Program finished normally.
python3 tools/update_bitstream_comment.py lighthouse.asc "6"
icepack lighthouse.asc lighthouse.bin
It passed!
It doesn't compile all the time, though, and I'm not really sure why. So, I'll have to read up some more on their toolchains and whatnot, and probably install Docker and do things properly.
But, the next step in the More Accessible Tracker journey is talking to the board! So, stay tuned for that. I'll need to rig up a voltage divider, a serial connection, and solder to this $120 board :E
Creating a More Accessible Tracker Using the Bitcraze Lighthouse Positioning Deck
2023-02-24
Introduction
When I began working on ClearGauntlets last year, it quickly became apparent that tracking was gonna be a bear of a project. For some reason, I figured that it was a solved problem. Somebody must have created a simple, easy-to-build device on the cheap to talk to Valve's cool lighthouses. And I was very wrong. This post will explain what I wanted to do, how wrong I was about how easy it would be to do so, and what my plan is going forward.
TL;DR: I've purchased a Bitcraze Lighthouse Positioning Deck and want to make my own Lighthouse 2.0 trackers because I am curious to see if I can.
The Problem
VR tracking is, actually, an insanely complicated challenge. One that took AAA engineers decades to figure out and create a consumer product that didn't quite cost $1000. During the later half of the 2010's, hackers gained some traction on reverse engineering Valve/HTC's Lighthouse tech. From those efforts came libsurvive, an effort to fully unravel the stack, from the protocols that the lighthouses use to communicate with tracked devices, to the solving equations embedded in Valve's proprietary blobs. It's a truly incredible project that has been a huge inspiration to me on my short VR journey so far.
However, these guys are focused on how to take Valve hardware and make it talk to their software. What I needed for the ClearGauntlets project was basically the opposite: Taking our hardware and getting it to talk to Valve software. ClearGauntlets is supposed to be a "More Premium™" Haptic Glove solution. Our target kit price is $200, all included. We're a fork of the LucidVR project, whose Prototype 4.1 glove is supposed to cost somewhere around $60. However, they don't include in that price things like the batteries and trackers. That project relies on you either finding a way to mount your controller to your hand, or dropping a few hundred on something like Vive Trackers. I didn't like that, so I wanted to find a way to incorporate tracking into our gloves.
Research
We didn't have a lot of options. Because I only had an original, 2016-vintage HTC Vive, knew very little about VR, and yet was somehow the resident expert on the team, I decided to target the SteamVR ecosystem. I figured that it would be easy enough, and we went about googling. In a few weeks, we had only found two "open source" solutions for DIY tracked devices: The HiveTracker, and the Vive DIY Position Sensor. These looked like great options, until we realized that they were 7-ish years old. Not only that, but they only supported Lighthouse 1.0, and not the newer Lighthouse 2.0.
Until we found these projects, I didn't really grasp the fact that there were two versions of Lighthouse tracking, and that if Lighthouse 1.0 was a Cessna prop plane, Lighthouse 2.0 was an F-18. 2.0 brought a slew of improvements and optimizations to SteamVR infrared tracking, and explaining the details and multitude of complications therein is out of scope here. What's important is that I very quickly realized that 2.0 tracking was not a solved problem for hackers, this entire problem is the kind of thing that people write about for their PhD thesis, and if someone was going to do it, it would be difficult and expensive.
So we focused on Lighthouse 1.0 for now. It wasn't what we wanted, but we figured it would be good enough for the better-than-proof-of-concept gloves that we were trying to make. Lots of people—myself included—still had Lighthouse 1.0 gear, right?
That was in October-ish. I kept reading. Eventually, sometime around December, I found the Bitcraze Lighthouse Positioning Deck, a board sold by Bitcraze designed to enable their open-source drone platform to be tracked with Lighthouse 2.0 technology. This was.... what I was looking for. All their source code, schematics, documentation, everything is available on their website for free. The board even has solder points for serial connections. I thought, "What the hell!? How come someone hasn't hacked this thing already?" I asked around on the LucidVR Discord, and the primary reasons, of course, are cost, and engineering effort. This board is $90, plus tax, plus shipping, comes out to $120. For that, you could get a Vive tracker that's plug-and-play, no fuss. It doesn't make sense for your average hacker to buy a "development" board for the price of a market-ready product when they are trying to make a pair of haptic gloves or whatever.
The whole time I was researching, I had been made aware through a friend of mine the SteamVR HDK. Essentially, back in the mid 2010's, Valve had created a suite of hardware devices and software tools to help people make SteamVR compatible tracked devices. This would be perfect for this project, if only they still sold them. I've had a pretty tough time tracking down info, but to my understanding, the project is pretty much dead, unfortunately. A lot of links on their page are dead or broken. There is still a lot of info on the software on Steam's website and other places.
Another project worth mentioning is Tundra Labs' SIP, but that has also been out of stock for months. Their datasheets do offer some nice inspiration.
A Long Road Ahead
I, however, am stupid. A fool, you might say. I hadn't yet realized that VR is actually pretty expensive. I wasn't ready to accept that my "all-included" gloves probably needed an extra $100 tacked on at least for an off-the-shelf tracking solution. However, I also realized that in order to take all of Bitcraze's IP and turn it from a drone product back into a SteamVR product would take a lot of time, effort, and money. So, I let the idea sit for a while.
Until today. Today, my Bitcraze Lighthouse Positioning Deck arrived in the mail, all $120 of it. If you're on the #tracking-solutions channel on the LucidVR Discord, you'll probably have seen me raving about this project. I've decided that I need to take a step. I'm not really in this to play VR games. I'm in this because the tech is cool as hell. I've got this board, and I'm going to see if I can talk to it. Then, I'm going to see if I can program it. Then, I'm going to see if I can hack it. I'll be documenting my progress on this website. Probably on this page, so check back for regular updates.
The Plan
This will take months. It could take years. I don't want to give anybody the impression that I know what I am doing. I am an engineer by trade, yes, but I am such a noob to the entire VR space and tech stack. I have no idea why I'm even doing this other than, "It's neat." I can almost guarantee that this will crash and burn. I'll hit some roadblock that will mean this project is dead. This is probably the most difficult, most expensive thing I've ever done. But I'll give it a go, so that Other People Don't Have To™. At least then we'll know.
Here's the plan:
- Get it set up with my lighthouses (V1.0), and get data out of it onto my computer in literally any capacity.
- Talk to it over serial. Set up toolchain, build + flash firmware.
- Get it talking to SteamVR.
- Start Hacking it. Add sensors, try making my own device. Design some PCBs, print some trackers, etc.
What is the end goal, you might (and definitely should) ask? Well, I just think that SteamVR Trackers are Too Damn Expensive, and I think it would be Swell to have a single tracker cost $60. Now that I've seen how difficult this field is, I think that would be reasonable. That would still mean that my $200 pricepoint for ClearGauntlets would be tight, if not impossible, since that'd be $120 for tracking alone for a pair where we originally wanted to spend no more than $50, but $25 for a tracker is almost certainly a pipe dream, at least in 2023.
In summary, I want to take Bitcraze's design and source code and turn it into a Vive Tracker That You Can Build At Home. Order the PCB, order the parts, print a case, solder it up, flash it, and you're off. A DIY tracker for $60 designed for humans (not drones) to wear. That price has to include the PCB, every component on the PCB, the battery, the chassis, and any additional mounting hardware you'd need.
Here's a list of everything off the top of my head that will be a P R O B L E M:
- The FPGA (and by extension Bitcraze's board) needs EXACTLY 3.0V. NOT 3.3V.
- The FPGA only appears to have enough I/O for 12 TS4231's (the chip connected to the photodiode that gets pulses from the Lighthouse)
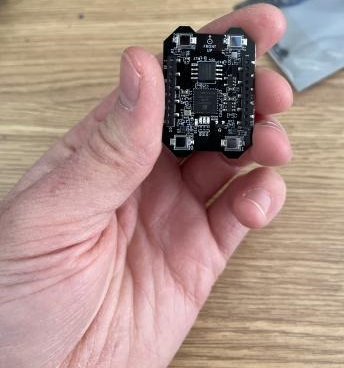
- Everything is REALLY SMALL. Seriously I ordered this board and have it in hand and MY GOD IT IS SO SMALL
- Chip shortage could completely ruin my life. I've checked DigiKey and Mouser, and they seem to have stuff in stock, but I haven't actually bought anything yet because I am a coward.
- Bitcraze's FPGA code is written in Scala
- I don't know Scala
- I haven't a clue how I'm actually going to get data off the board yet
- Because the FPGA runs at a non-standard voltage, I'll probably need to order some kind of special cable to connect it to my PC.
- Secondly, the Lighthouse Positioning Deck does not have any kind of CPU onboard, only the FPGA, so I need a microcontroller and that'll probably be a lot of work.
But other than that, this seems pretty easy. I've got the board here on my desk, and I'm looking at it right now... and I just realized that I'm writing this blog post to delay working on solving all of the above problems. So... guess I'm gonna go do that.